
9 different ways to create the best backgrounds for food photography

Photographed for Bhavana Cooking School. Styled by Sarah DeNardi
Backgrounds are the make or break of a good food shot. Every food photographer or stylist has their own approach to sourcing or producing great backgrounds. Here are my top nine;
1 RECYCLED WOOD
There is no denying that beautiful textural wooden backgrounds look fantastic in a food shot and really are the ultimate choice. On the downside, storing and lugging around massive hunks of bench tops, raw wood, old doors and railway sleepers isn't the easiest, so it's not always a realistic option. Even if you do have enough space and an appropriate vehicle, sourcing nice wooden backgrounds can be an art in itself.
Weathered, aged and antique woods are very on-trend at the moment and have been for some time. There's no obvious end to this fad in sight, and with good reason. There is nothing quite like a bit of peeling paint or weathered, dinged wood to give your image personality and texture.
But where can you find such ideal specimens? Well once you've exhausted your friends/ families options and been through every attic/garage in your range, the next step is to scour reclamation yards, junk yards, salvage yards, antique stores, recycling depots, and local auctions. One person's trash is a food photographers dream.
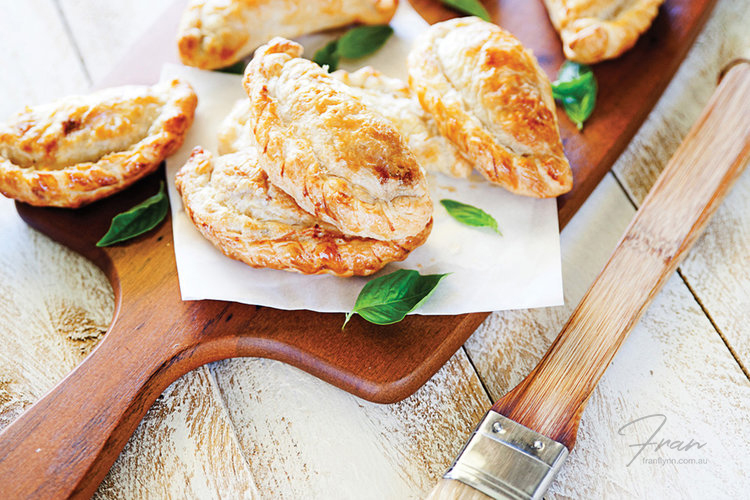
Photographed for "PAIRED: Champagne & Sparkling Wine - The Food & Wine Matching Cook Book for Everyone"
2 FAUX RECYCLED WOOD
Another alternative to is to create your own 'aged' wood effect. It can be a very satisfying project to take home some cheap pine and end up with something that looks like an antique finish. There are literally hundreds of different techniques you can use to achieve an authentic looking result. A quick Google or Youtube search will present heaps of options. Personally, I particularly like the ones that involve beating your wood with chains and a 'brush' made with large nails! Also putting a layer of gravel between two board, and then standing and 'surfing' on the top board is pretty fun and effective.
When you're choosing your wood try to pick pieces that have plenty of knots and are a bit rough already to get a more gnarly result.
One important thing to check is if the wood has been properly dried because I've discovered the hard way that if it hasn't it can be prone to warping, which means that your lovingly aged boards can suddenly refuse to sit flat. Apparently you can un-warp them by wrapping in damp cloths and ironing on-top — but I haven't tried this myself yet.

Photographed for Sifu Restaurant. Styled by Sarah DeNardi
3 FAUX WOOD BOARDS
I tend to haunt flooring shops quite a lot! There are a few different types of flooring that can work well as a substitute to real wood. My favourites are wooden tongue and groove boards that click together. They offer the most authentic look. They are also usually relatively expensive and sometimes not available in a broad range of finishes.
Vinyl floor boards vary in quality considerably. Some can be quite thin and sticky backed - which means you can adhere them to a board if you'd prefer. They usually come in boxes of approx 1-2m square (approx. 3-5ft square), which is more than enough. Sometimes there will be a split box available and you can negotiate a reduced price. Alternatively, you might be able to trade half a box with another photographer for something they've picked up. My favourites are (of course) usually the most expensive kind. They are generally quite thick because they're designed to absorb noise. They don't have an adhesive back and they sit together very nicely when placed on a table. These type of boards are usually quite authentic looking and also tend to have a nice matt finish on the surface which is important because the glossiness of some cheaper boards can cause major issues with reflection. Once the reflection on vinyl boards is evident, the game is up and it's clear your surface is faux.
One very important thing to realise is that even in super-stores, most shops are limited in space, so they tend to only keep their most popular lines on the shelf, which means that often you need to order-in to get the design you're after - which is often not ideal when you plan to shoot soon. Forward planning highly recommended.

Photographed for "The Ultimate Guide to Natural Light for Food Photography"
3 HAND PAINTING BOARDS (wooden and plastic)
This is a very effective way to create exactly the colour/style of background that you're after and there are a variety of techniques you can use. While using a light cheap wooden base-board is the most popular choice, I recently discovered that using a water-based primer called 'grip lock primer' makes it possible to use water-based paint on light plastic boards (like sign board) without it easily peeling off again. I also discovered that putting sellotape on the painted board and then removing it again is asking too much of the primer! (NB: make sure to sand lightly first to help the primer to grip the board) Plastic boards are light-weight, cheap, easy to store, easy to carry/transport and don't warp.
Select a range of water-based colour tones and purchase them in the small sample pots size that most hardware stores offer. One sample pot will be enough paint for a few backgrounds. A small pot is less than AUS$5 in my local shop and so far 5 pots blended and mixed in different ways have produced four very different texture boards, with plenty of paint left to play with.
Painting techniques:
On grainy wood - dry brushing sparingly and then selectively sanding back off again will create nice aged textures, with maximum grain. Layering colours works well - eg. eggshell blues/turquoise followed by a layer of antique white. When you sand the shades of blue will peep through the top white layer. This is a similar technique used for giving furniture an aged appearance so there are lots of Youtube videos available to choose from to refine your technique.
On smooth boards - to create textures you can first add a layer of fillers/plaster and move it around with a palette knife or other tools of your choice until you're happy with the textural effect. You can also buy additives (like sand grains) to add to your paint to give a textural finish. Essentially any technique that might be used to add texture to a wall can be used on your board.
Download a FREE chapter of my ebook 'The Ultimate Guide to Natural Light for Food Photography' by adding your details here:

To create texture just with paint there are many techniques. I like to work with 3 tones (see photo example above) - usually two colour tones that are similar to each other (eg. turquoise in a very light and slightly darker tone) plus for example white. I spread a few blobs of each colour on the board and start blending using rough sponges in a dabbing motion. You don't want to blend too much or all the colours merge together. I'll often layer this technique a few times until I'm happy with the result.
Adding a layer of 'spray' by running a piece of card along the bristles of an old rough brush to create a splatter effect is also a nice touch. Just make sure you test which direction to spray before you start - the taste of paint is not the best!
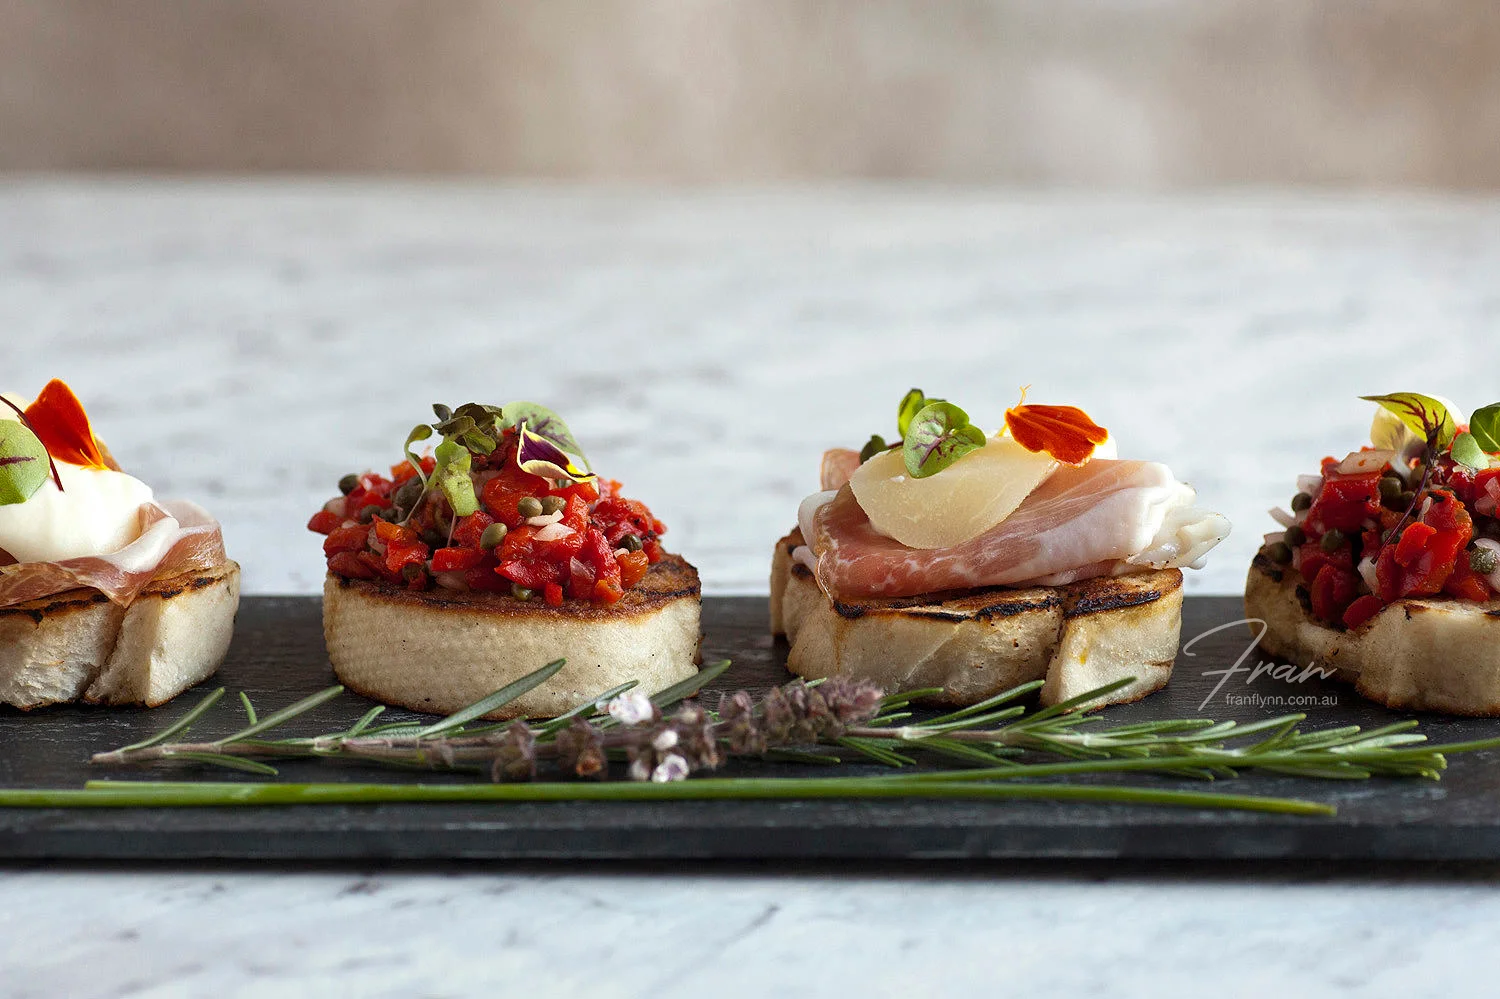
Photographed for Balthazar Wine & Dining
4 FLOOR TILES
"Enough of these art projects" I hear you shout! For those of you that aren't keen to get your hands dirty there are still plenty of options. Floor tiles come in wide range of finishes, from vinyl to ceramic, to stone. Cheap sticky back floor tiles can often be purchased singly. The limitation of tiles is that they are usually approx. 300mm (12 inches) square and this isn't usually big enough for a background, which means that you are likely to see a seam in your image. Depending on the pattern you could potentially retouch this out easily in post-production, or if you're shooting something very small, stay within the restricted area. I've sourced a few different floor tiles that give a nice faux marble effect.

Photographed for an editorial piece. Styled by Sarah DeNardi.
5 FABRICS
Fabrics are very diverse and offer a really broad range of textures and colours to choose from. Consider non-standard fabrics like sacking that would normally contain coffee or fruit as well as fine linens and other textural options. Choose patterns carefully — you usually want your fabric as a background element, not as a centrepiece — so avoid anything too dominant or overpowering. As a side note, having a piece of cheese-cloth in your supplies is always a useful texture that can be used again and again both as a prop (e.g. napkin, or as a layering element) or as a feature on a background. Most fabric stores allow you to purchase by the half metre which I find useful for making napkins (a simple seam all around is an easy finish and much less expensive than buying packs of four napkins). If a fabric has potential as a napkin as well as a background, don't forget to buy an extra half a metre. I usually shoot on a table area of about 1.2m square (4 ft square) so I'll often buy 2m of fabric (6ft).

Photographed for Balthazar Wine & Dining
6 VINYL BANNERS
Another very useful consideration is getting banners printed with a stock photo of your choice up-scaled to the size you choose to print. This is particularly useful for non-portable finishes like concrete.
It is usually easy to find a banner printing shop, and they will have an in-house computer operator that can take your stock photo (you should buy the largest size possible) and upscale it to the size you need, either through duplicating and merging or blowing it up. Make sure to print large enough. I like to have enough area in my background to be able to have depth, and have 3 layers to that depth, ie. props in the foreground, middle ground and background. Once the longest size of your tabletop background is less than 1m this becomes harder.
Make sure if you're using this technique to select a banner material that is non-reflective, reasonably thick (lessens the chances of it getting dinged), and completely smooth — i.e. no perceptible texture - because it will definitely show up in closeup shots.
You can also purchase pre-printed vinyl backgrounds that have been specially produced for photography purposes. (See point 9.)

Stock Image
7 METAL BAKING SHEETS
Some of the nicest texture in food photograph backgrounds comes from the oldest, roughest cooking sheets you've ever seen, with years of grease and rust baked in. They can be surprisingly hard to come by, but leaving a tray in the bottom of your oven and deliberately spilling things on it on a regular basis will create a lovely result surprisingly quickly.

Stock Image
8 PAPERS AND BOARDS
Art supply stores are another place that I can easily lose hours without realising it. Usually you can find great selections of different colour art papers and boards. I buy several sheets at a time to allow for spills and rips.
9 PROFESSIONAL BACKGROUNDS
Instagram has helped fuel a massive increase in the demand for table-top photography and as a result, many professional background makers have sprouted up. The quality of backgrounds on offer can be very variable, so research carefully before committing.
Etsy, eBay, Pinterest and a google search will bring up lots of different options, with Etsy probably having the most reliable selection in my opinion. I have noticed that some vendors offer particularly cheap vinyl backdrops which can be printed on low-quality stock with an insufficient resolution in the images printed upon the surface. These might still work OK for a distance shot, e.g. for portraiture, but as a base background used for closeup detail in food photography, it would be pretty useless, so purchase with caution.
It is also possible to purchase high quality wooden or other format boards, with very high-quality hand-painted or photographed finishes... so if you have the budget and prefer not to get your hands dirty, and can wait for the delivery, they are all very worthy of consideration.
You might also like:


Hi I'm Fran, a professional photographer and designer based on the Gold Coast in Australia. I’m a lifelong creative, passionate about producing drool-worthy images that provoke emotion and communicate deliciousness. My obsession is teaching others how to achieve the satisfaction of realising their creative vision too. I also love to produce high quality visual books (especially cook books) for my clients.